

2.25.2010
2.24.2010
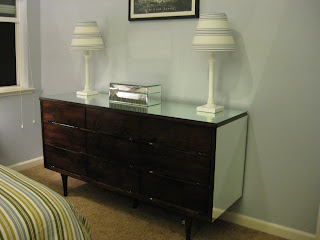
5 weekends of naps, 1 MTO & $140
I posted this a while back on my personal blog, but I am now transferring it here as one of my completed projects! I have no idea why it is publishing with all caps when in my perview mode it is with upper and lower cases.
Last summer our street had a neighborhood yard sale. Of course, baby and I had to go check it out. I had been on the look out for a dresser to overhaul and I had actually already bought one from Craig’s List a month prior for $45, delivered, but it turned out not to be what I was looking for. Well, as my son and I were strolling around with a few toys we purchased waiting for us a few houses away, we came across a Mid Century Modern Danish dresser that was in dire need of a reno! My heart started beating fast and I raced to find the owner to ask how much it was. She said it was $5 and since I had $4 one dollar bills, she gave it to me for four buckaroos! Later that day, some men brought it down to me in a trailer and set it on top of the other dresser I bought in the garage. My heart was beating even harder and faster now because I knew I would have a mad husband to placate when he pulled into the garage after getting home from work that night--but I had to have it, you see.
The dresser sat there for a month as I pondered over my many ideas of how to revamp it. It sat there a few weeks more after I decided I wanted to face it with mirror. Then in July of last year I priced mirrors and compared glass to acrylic. A man came over to measure it from the Glass Doctor and I placed my order (for glass, not acrylic, since it scratches easily).
One weekend in August I decided to start my mission. I put baby down for a nap and raced to the garage with my grubbies on and started stripping the paint away. Then, right before I thought he would wake up, I raced to take a shower so I would not smell of that toxic remover. This process continued for the sanding--and more sanding--and even more sanding for several weeks. Then on to staining (x2) and finally the polyurethane (x2). Many naps and showers later, I was ready to apply the mastic to the dresser and stick the mirrors on. Then after baby went to bed, hubby helped me lug it up the stairs to the guest room (I wanted it in the downstairs entry but hubby-the-design-guru did not concur). So after 5 weeks of naps, an MTO (cost cutting mandatory time off from the job) when my lovely mom watched baby, and $140 later, it was finally done! Now, maybe I will do something with that other dresser in the garage after all!


 more scraping...
 a dirty job...
 getting there...
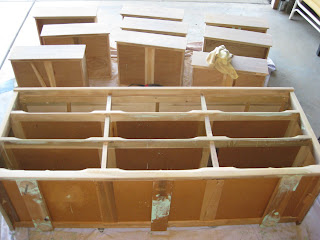 Sanding...
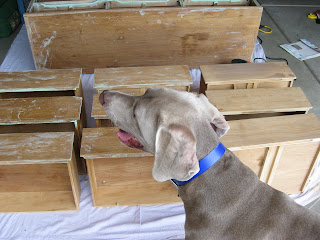 more sanding...
done sanding!

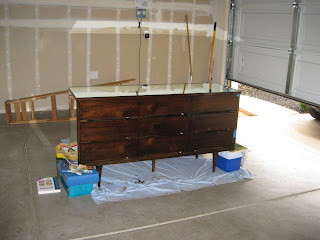
1st coat of stain
 2nd coat and poly
.jpg)
 Adding the mirrors...
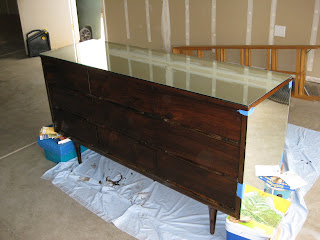 Mission Accomplished!
2nd coat and polyAdding the mirrors...Mission Accomplished!4 comments
2.22.2010
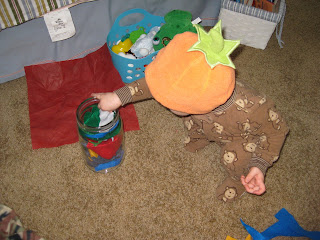
my sweet little helper
 I recently cleaned up the guest room from all the "construction" zone craziness that accompanied the craft nest creation. This allowed for my son to join me in the room for the first time. Oh what joy it brought to my heart to have him in my craft nest with me while I created and he played with felt at my feet! I cannot tell you how wonderful a feeling that was. He took the felt out of the jar and put it back in. Took a little detour to play with something else and then came back to it. Joy of joys!
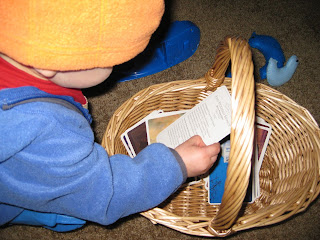
 I also bought him several sets of flash cards to play with from Target's $1 bins a month or two ago since he loves photos and paper products. On his changing table I give him a few animal flash cards to hold and we make noises of the animals to keep him distracted enough not to flip over (which he can do in less than a second with no notice!). I had a set of presidents flash cards that he had not seen yet and gave those to him to sort through and play with as well. Very fitting for all the presidents' birthdays in February!
I remember very fondly sorting through my mom's button jar as she sewed. I would organize them by color or type in muffin tins--oh so fun!!! I hope my son will find sweet moments as I did and then someday even begin creating himself. He had a head start on that a few months ago when I melted down old crayons and molded them in a rainbow of layered colors in a heart shaped silicone mold. He colors with the crayon hearts once in a while. He also got some markers last week that he got to scribble with under close supervision. But I digress..it was such a wonderful experience to have two of my loves, my son and crafting (one much greater than the other), in the same room!
p.s. I could not believe he actually wanted to wear a hat! He chose this pumpkin hat to wear and kept it on for much of the weekend. Maybe he will be a hat wearer after all! Hurrah!
button pin cushion
.JPG)
.JPG) While working on my little felt birdies, I needed to have a handy place to put my needles since I was using a needle wheel which was does not accommodate threaded needles. I turned to my trusty felt again. I just happened to have the same pink and green colors as my craft nest. I just needed to come up with a shape. I thought of a dog, a mouse, a pig...no, i just can not poke needles into an animal--too weird! I needed an inanimate object to model my pin cushion after. And a button it was!
While working on my little felt birdies, I needed to have a handy place to put my needles since I was using a needle wheel which was does not accommodate threaded needles. I turned to my trusty felt again. I just happened to have the same pink and green colors as my craft nest. I just needed to come up with a shape. I thought of a dog, a mouse, a pig...no, i just can not poke needles into an animal--too weird! I needed an inanimate object to model my pin cushion after. And a button it was! It is reminiscent of sewing, so it seemed the perfect fit. I traced a jar that was sitting on my desk as the circle for the the larger light green circle and also the darker green ring around the outside of the button. I just freehand cut the inside of the darker green circle to expose the lighter green felt. I sewed them together with my trusty invisible Ikea thread (I've had this thread for at least 4 years and just now started using it--now I want to buy some more!).
Next, I freehand cut some bright pink circles for the button holes and sewed them on and voila! A pin/needle cushion for all those wayward needles!
Next, I freehand cut some bright pink circles for the button holes and sewed them on and voila! A pin/needle cushion for all those wayward needles!
new use for shelf
.JPG)
I adore finding new uses for old things, or new uses for something not as it was intended. While trolling the asiles of Lowes a few weeks ago I saw some glass shelves on clearance and wondered what I could do with them. I decided to get one that was 12"x12". It was only about $4! I thought I could use it as a cutting board for my craft nest. I already had a small glass rectangle that came with my circle cutter, but the edges were not rounded and it was a small size. The best part? The circle cut outs in each of the corners! It makes it so easy to pick up!
valentine for my valentine
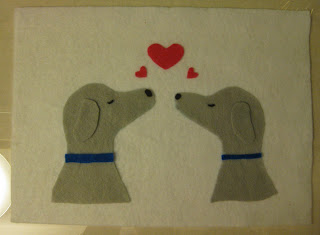
In a previous post on my desk was a little teaser of this valentine for my husband. It was inspired by our weimaraner, Gimli, who was our original baby, before our real human baby. So it is a little tribute to him too since he has been replaced as numero uno around here! 
 I still (a week after valentine's day) have not figured out what to do with it. I just gave it to my husband like a valentine's card. Maybe one day I'll decide to frame it, make into a bag or pillow or ??? any ideas?
I still (a week after valentine's day) have not figured out what to do with it. I just gave it to my husband like a valentine's card. Maybe one day I'll decide to frame it, make into a bag or pillow or ??? any ideas? I have been working with felt a lot lately. It is such an easy medium to work with! No raveling of seams, it is so forgiving and comes in great colors! And bonus--the kind I bought at JoAnns is even made with post consumer water bottles!
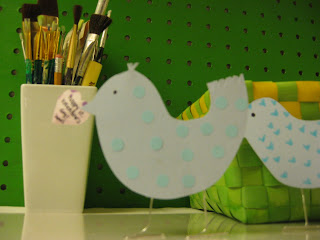
birds birds everywhere!
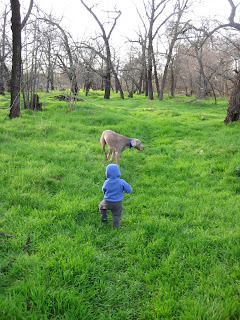
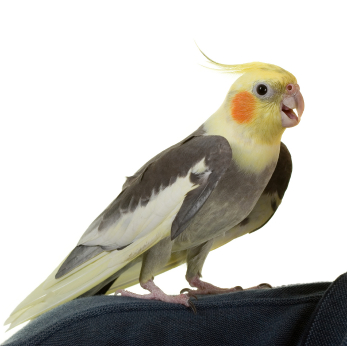
I don't know why birds have become a favorite of mine for crafting lately. I do not have a real fondness for birds, really. They deposit things on my car, they squawk early in the morning, and as a child we had a few cockatiels and they sure made a mess with their bird seed. However, I have been drawn to them of late. Perhaps because "bird" was one of my son's first words (although he refuses to say the word now, and prefers to call everything "that" and wants mommy or daddy to tell him what it is he is pointing to. He is fascinated by birds and has a terribly sharp eye! He can spot a bird a mile away in the sky! He also has the sweetest little high pitched "tweet tweet" when asked what a bird says. Heart warming, indeed.
I saw a cute little birdie on Saltwater Kids blog and it inspired me to make this from the same template as my valentines' birdies.
So I decided to make a bird mobile for him.  Then I ended up making one for the guest room where my craft nest is located.
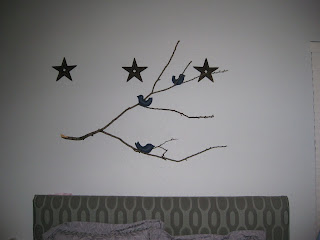
Then I ended up making one for the guest room where my craft nest is located. As you can see in this photo, I used invisible thread to hang the branch. After some experimenting with floral wire, I decided to use the invisible thread (from Ikea) to secure the birdies to their perches as well and this worked superbly!

Then I made another! What to do with all these birdies on branches? Give them away of course. I posted on Facebook that I had a birdie mobile to giveaway and I would have a random drawing for it.Since I was busily making more birds, I had several to give away and since only two people responded-they each got one!
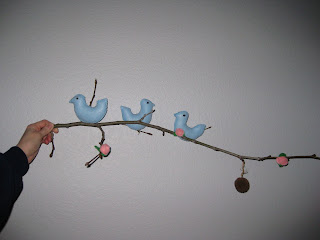
But in the meantime, I decided to embellish them a little once I saw these adorable little felt roses on our hartbeat. I could not resist them! It is perfect since both ladies that requested the birdie mobiles have little baby girls.
.JPG)
I love how this one has a sweet little seed pod hanging from it!
Hope you enjoyed the little birdies!
birdie valentines
I found these sweet little birdie valentines on here on Ms. Delightful's blog and decided to make a bunch of them for my family and co-workers. They were very simple to make once I free handed a few bird templates and bent all the paperclips so that they stood up. I think I ended up with a flock of about 25-27. I wish I had taken a photo of the flock before they all flew their separate ways. It was fun to make them and set them upon my coworkers' desk before they came into work. 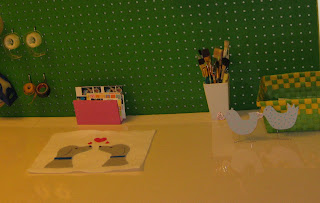

These are just two of the many I made from an old light blue manila folder and bits of scrap paper for the dots and heart. I even used bits of an old shower invitation for some of the hearts. I used the flower punch cutouts of paper punch and used a gluestick to glue on to a few, and some of the others I used decorative paper. Each one was unique. I think my favorites were the plain jane baby blue old manila folder ones with no embellishment though!
See upcoming post about the felt valentine's pups!
2.20.2010
my first post!
Hello and welcome to my little piece of the blogoshphere: april's craft nest! I have been inspired to create an additional blog, besides my family one, dedicated to all things creative: crafts, sewing, ponderings, musings and things I find beautiful. I was inspired mostly because of my new guest-closet-made-craft-nook, which I call my craft nest. I finished it about 3 weeks ago and I just love going in there to craft, create and just to ponder. Here are some photos of its evolution.
The beginning:  the upper shelf:

Cute little banner--I will soon create one that says craft nest!
If you are interested in the play-by-play of how the craft nest came about, please continue reading a little cut and paste from my original blog:
Since these photos were taken, I even got a little clip-on lamp from Ikea (for about 6 bucks! love it):
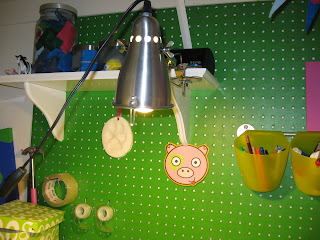 Makes it much nicer to work in the closet now. I was using a floor lamp inside the closet before, but it made me a little nervous since the bulb was up high near the shelf full of paper products.
the upper shelf:Cute little banner--I will soon create one that says craft nest!

If you are interested in the play-by-play of how the craft nest came about, please continue reading a little cut and paste from my original blog:
I decided to carve out a bit of square footage dedicated to one of my passions: crafting (really "projecting" i.e. paper crafts, painting, sewing, thinking up ideas, messing around, etc.)! I like to have projects evolve--to think about them over time and mull over ideas. I have not been able to do this very much between working and being a mommy and wife lately and boy have I missed it. It is difficult to leave projects out with a toddler and my projects typically last longer than a single nap time, so I wanted a space where I could leave my "ideas" out and a place where I could feel creative. I also needed a place where the door could be shut because my darling hubby does not like to have clutter and messiness around and to him my crafting, projects and just my name spell= m-e-s-s!
So.... I created a little crafting nest in our guest room closet. I started about three weeks ago. Four trips to Lowes, a trek to Ikea and several weekends and my mission was complete! AND I only spent about $125 for everything! The biggest single item cost was the acrylic sheet that covers the desktop--and that was just under $20. The second single item cost was tied: the 4 legs from Ikea and the shelf from Lowes, which were both around $16 each! (I wanted an Ikea LACK shelf, but they were out of stock when I went). I could have saved almost $30 if the table top I originally wanted from Ikea was in stock (it was only 3.99!!!!) but it was a tad smaller and this one is custom shaped to our closet, so it worked out in the end. My least expensive item was the green paint for the peg board. It was a oops sample size paint can (to paint 4'x4') and it was the perfect shade and amount! The nice lady at Lowe's marked it down to 50 cents without me even asking!!! I am starting to sound like one of my favorite website authors bragging about deals and explaining projects step by step, but I am just too excited! All in all I purchased 20 new items (or types of items) for this project. My best reduce, reuse, recycle item is the white cloth which is covering the ugly particle board desk top (under the acyclic sheet). When I could not get the Ikea desk top I wanted I had to go with particle board since it is smoother than plywood. I was going to spray paint the underside of the acrylic when I decided to cover the desktop with fabric instead. I went with white since I wanted a solid color surface and a clean slate when starting my projects. I just staple gunned the fabric under the desktop and set the acyclic on top and presto--a beautiful white clean surface to begin multitudes of projects! Since these photos were taken, I even got a little clip-on lamp from Ikea (for about 6 bucks! love it):
Makes it much nicer to work in the closet now. I was using a floor lamp inside the closet before, but it made me a little nervous since the bulb was up high near the shelf full of paper products.Well, thank you for stopping by! I hope to fill this blog with lovely things to help me remember what I have worked on, what I have been thinking about and what inspires me. I hope you will leave a comment so I know someone out there is reading this:)
Subscribe to:
Posts (Atom)